Updating Gates COMMAND / CONTROL (GCC) Module
Applicable Cameras
All RED Cameras utilizing RED Control Protocol 2 (RCP2). As of this writing that includes V-RAPTOR, KOMODO-X, and KOMODO cameras.
For Gates Housings
- PRO RAPTOR Housing
- DEEP WEAPON-RAPTOR Housing
- DEEP KOMODO X Housing
- DEEP KOMODO Housing
Required Equipment
- PC (Windows 10 or Linux) or Mac
- Micro SD card reader
- Internet connection
Required Software
PDF of this page
![]()
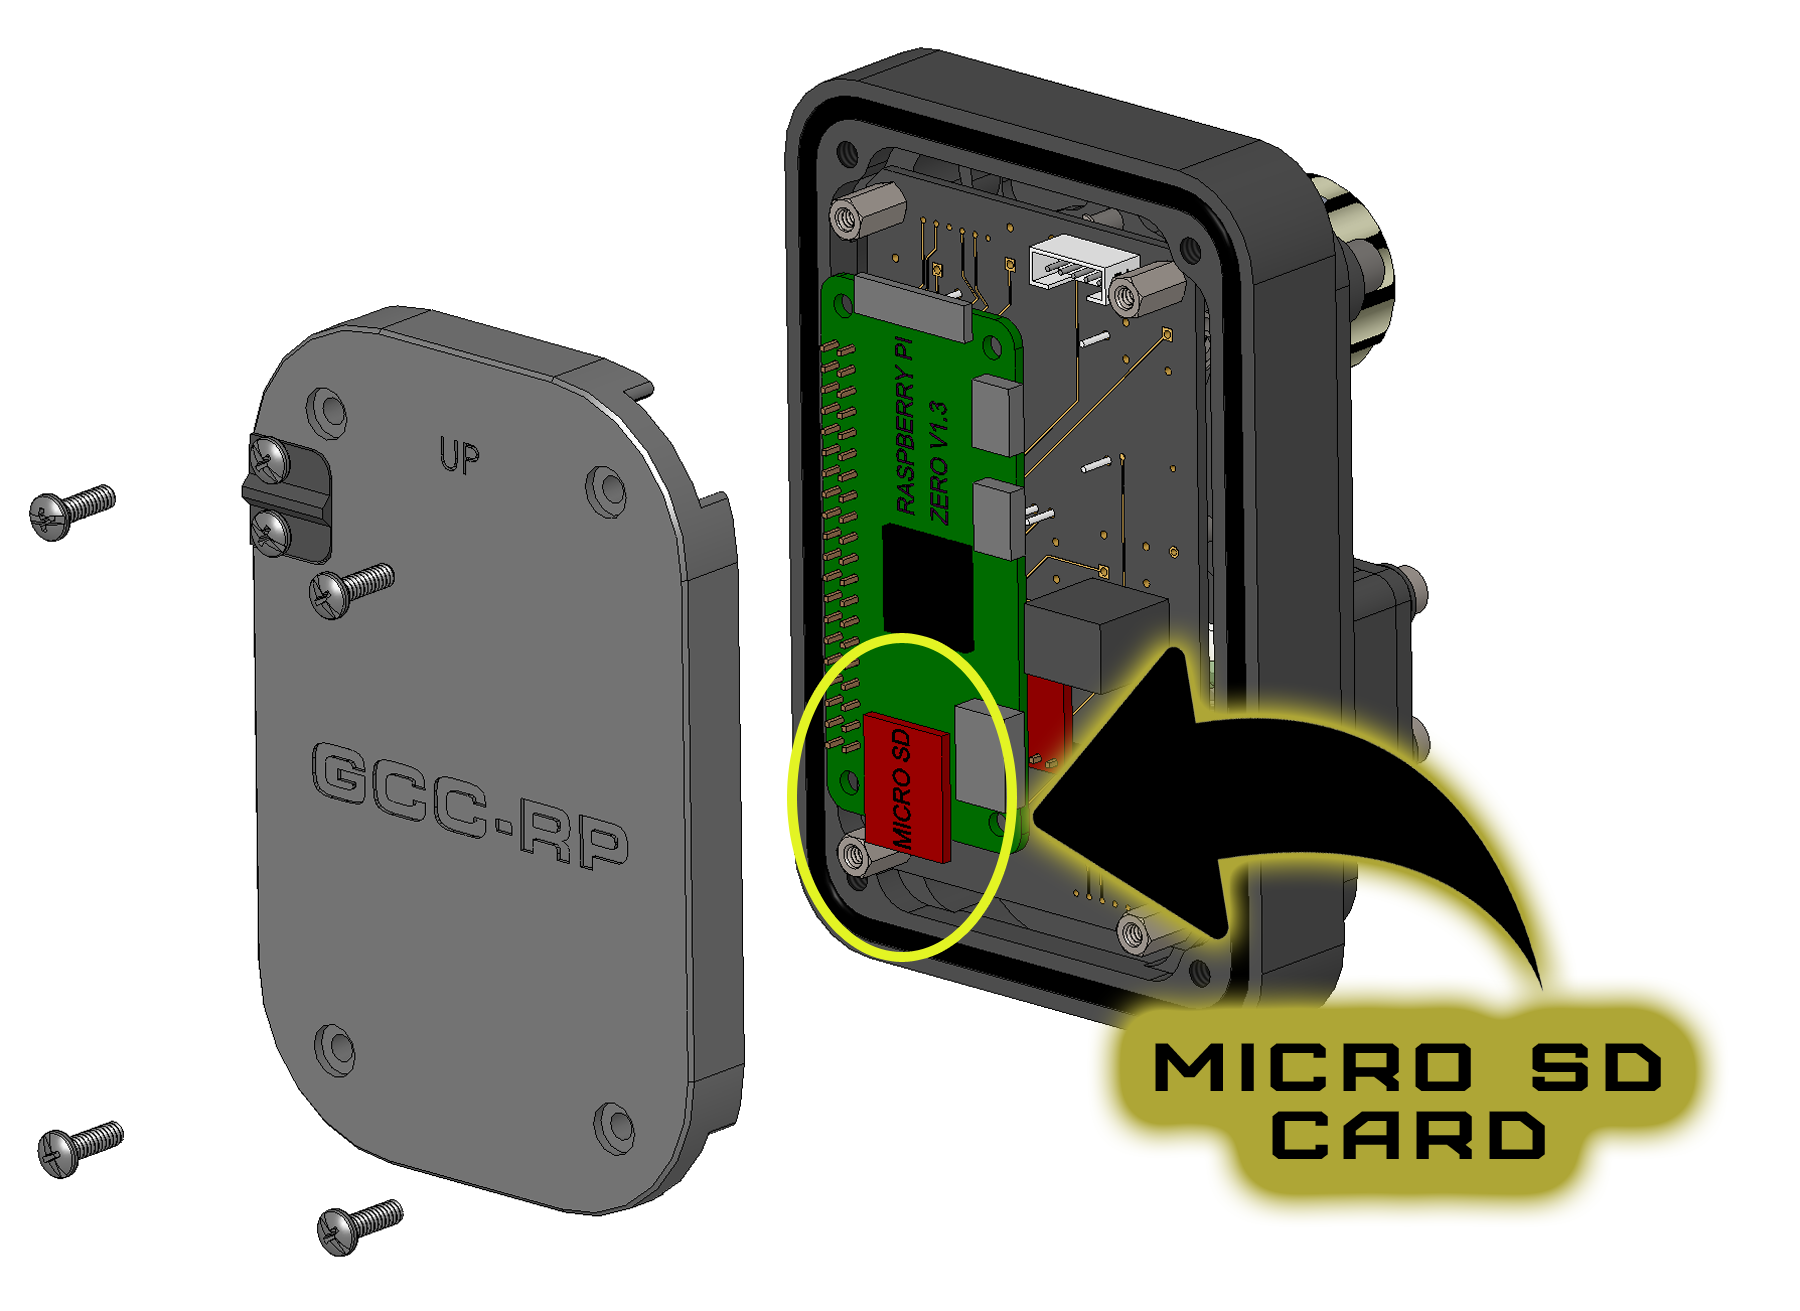
Step 1: Remove micro SD card from GCC
The micro SD card is located behind a removable cover, inside the housing shell. Remove 4 screws with the tool provided in your kit, and slide the micro SD card out from it's carrier.

Step 2: Connect micro SD card to your computer.
Using a micro SD card reader, connect and look for the micro SD card as an external drive labeled " boot".
Step 3: Download GCC update.
Save the file to a location you can find later. It must be a local drive, not cloud or network.
Download Link: GCC RCP2 Firmware Revision V1.20 Release Date: 6-2024
RED Firmware Compatibility: V-RAPTOR V1.7.5 or later KOMODO-X V1.2.5 or later KOMODO V1.7.5 or later
Release Notes: Report DC-IN on V-RAPTOR and KOMODO-X. Report Critical Notifications on Display. Other minor improvements.
GCC Keymap for V-RAPTOR camera
GCC Keymap for KOMODO-X camera
GCC-RP Advanced Programming Reference. A guide for changing all GCC controls from default to user-assigned functions.
Step 4: Download and install belenaEtcher
balenaEtcher is a utility program required to write GCC to the micro SD card.
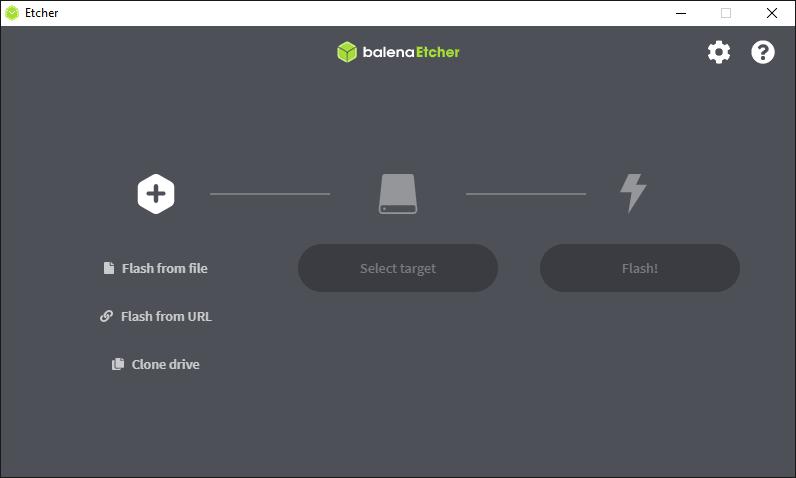
Step 5: Launch balenaEtcher and update GCC.
balenaEtcher will look like this. Click 'Flash from File' and locate the downloaded GCC update file (*.img) from Step 3. Select Target is the micro SD card. Flash!
The update process will take a minute or two. When complete, Close balenaEtcher and safely eject the micro SD card from your computer.
Step 6: Re-install micro SD card to GCC and test.
Reverse the process from Step 1, installing the micro SD card into GCC and securing the cover in place.
Connect camera and batteries power on the system, and verify GCC is operational. The standby display will show you the update revision to confirm successful install.
Contact Gates with support questions.