Updating Gates COMMAND / CONTROL (GCC) Module
Gates Z3 housing.
Required Equipment:
- PC (Windows)
- Micro SD card reader
- Internet Connection
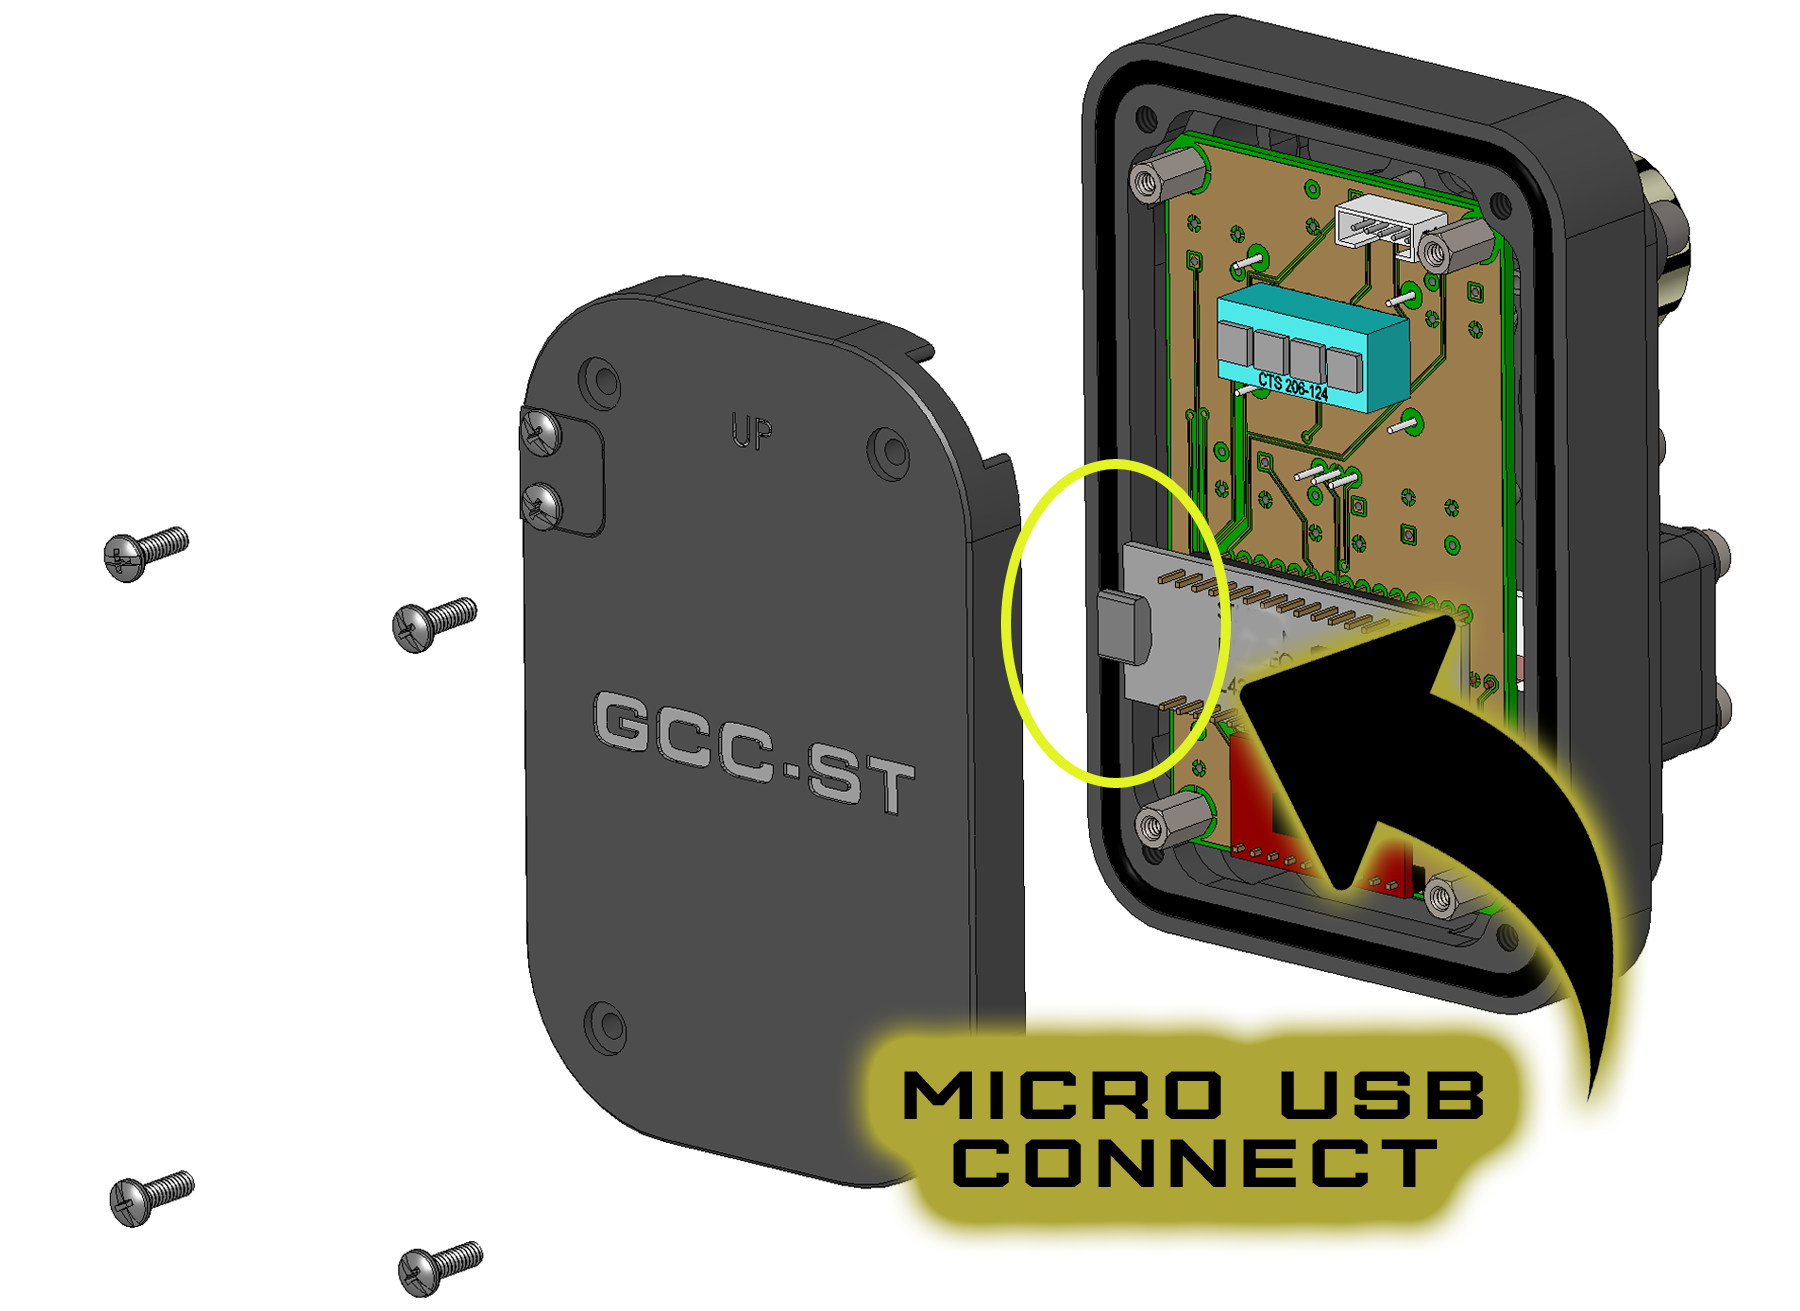
Step 1: Connect USB cable to GCC
The micro USB port is located behind a removable cover, inside the rear shell of Z3. Remove 4 screws with the tool provided in your kit, and connect the micro USB cable (also provided in your kit) to the GCC PCB as shown in photos.

Step 2: Connect GCC card to your computer.
Connect the cable now to your PC. GCC will power up, and appear as an external drive in File Explorer labeled NODE_L432KC.
Step 3: Download GCC update.
Save the file to your PC. It must be a local drive, not cloud or network. Unzip the file. It will be a .bin file type.
Download Link: GCC Z3 Revision V1.00
Release Date: 12-2-2020
Release Notes: Initial Z3 Release
GCC Keymap for this release

Step 4: Install update.
Simply drag and drop the update file to the external drive NODE_L432KC. The file will transfer, install, and GCC will reboot. Watch the screen to verify the new version successfully installed.
Step 5: Replace GCC cover, verify camera operation.
Unplug the USB cable, and replace the GCC rear cover.
Connect camera and batteries to power the system, and verify GCC is operational.
Contact Gates with support questions. GCC Update Z3 PDF ![]()